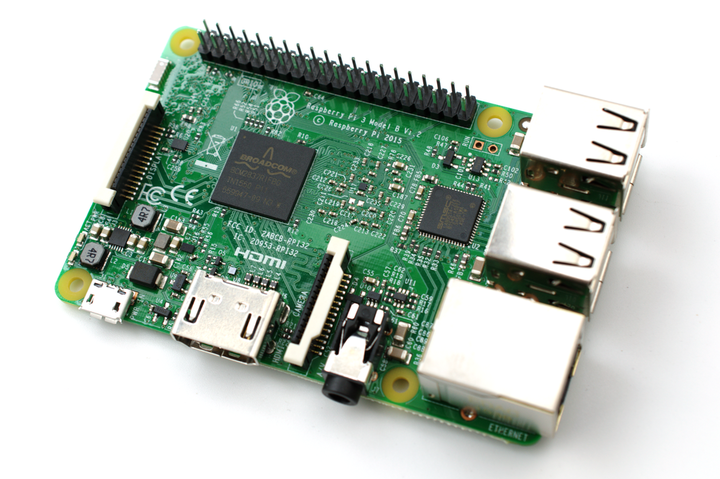
Raspberry Pi Password Manager

As data breaches become increasingly common, securing our online accounts is more important than ever. Cloud-based password managers serve to free us from the need to remember passwords but what of those who don’t want to store their passwords online (or are excessively paranoid)? In this post, we will set up a Raspberry Pi 3 with Raspbian and a Git repository which we will use to store our passwords.
We will use pass to manage our passwords.
Once set up we will have the ability to access our password from any *nix operating system.
Content
Raspberry Pi setup
This part documents how to install the Raspbian operating system, setup a SSH connection, create a Git repository and a little configuration to secure our device.
Download latest Raspbian image
$ wget https://downloads.raspberrypi.org/raspbian_lite_latest
Extract the image
$ unzip raspbian_lite_latest
Write image to our SD card
# dd if=./*raspbian*.img of=/dev/sd<XX>
Mount the boot partition from our SD card
# mount /dev/sd<X>1 ./boot
Enable SSH
$ touch ./boot/ssh
Set Wi-Fi credentials
$ echo "network={\n \
    ssid=\"<your ssid>\"\n \
    psk=\"<your password>\"\n \
}" > ./boot/wpa_supplicant.conf
Unmount boot partition
$ umount ./boot
Clean up files no longer needed
$ rm *raspbian*
The SD card has been prepared. We have configured it to automatically connect to our Wi-Fi network and enabled SSH.
It is time to insert the SD card into our Raspberry Pi and turn it on.
The next step is to setup the SSH connection and Git repository.
Generate SSH key pair
ssh-keygen -q -t rsa -f $HOME/.ssh/id_rsa -P "<passphrase>"
Copy SSH public key to Raspberry Pi
$ ssh-copy-id pi@raspberrypi.local
SSH into Raspberry Pi
$ ssh pi@raspberrypi.local
Change the default password to something secure
# echo 'pi:<newpassword>' | chpasswd
Disable SSH password authentication
$ sudo grep -q "^[^#]*PasswordAuthentication" /etc/ssh/sshd_config && sed -i "/^[^#]*PasswordAuthentication[[:space:]]yes/c\PasswordAuthentication no" /etc/ssh/sshd_config || echo "PasswordAuthentication no" >> /etc/ssh/sshd_config
$ systemctl restart sshd
Install Git
# apt-get update -y && apt-get install git -y
Initialise Git repository
$ git init --bare ~/.password-store
Local machine setup

Now we will initialise the password store and push it to the repository we have created on the Raspberry Pi.
Install gnupg and pass
The command you need will differ depending on your distribution, e.g.:
Arch:
# pacman -Syu gnupg pass
Ubuntu:
# apt-get install gnupg pass
GPG setup
Create GPG keys
$ cat >foo <<EOF
     Key-Type: default
     Key-Length: 4096
     Subkey-Type: default
     Subkey-Length: 4096
     Name-Real: <John Doe>
     Name-Email: <johndoe@example.com>
     Passphrase: <passphrase>
     %commit
EOF
$ gpg --batch --generate-key foo
$ rm foo
Export the GPG key pair
$ gpg --export-secret-keys --armor <johndoe@example.com> > \<<johndoe@example.com>\>.gpg-secret
$ gpg --export --armor <johndoe@example.com> > \<<johndoe@example.com>\>.gpg-public
You might want to look into using seperate siging keys for each device. This would make it easier to revoke a single key if you lose that device.
Pass setup
Initialise password store
$ pass init <johndoe@example.com>
Initialise Git repo
$ pass git init
Add remote Raspberry Pi repository
$ pass git remote add origin pi@raspberrypi.local:~/.password-store
Push to Raspberry Pi repository
$ pass git push
Secondary machine setup
We will learn how to use our password store on other devices
Generate new SSH key pair for new machine
ssh-keygen -q -t rsa -f <id_newmachine> -P "<passphrase>"
Copy public SSH key to Raspberry Pi
$ ssh-copy-id -i <id_newmachine> pi@raspberry.local
Copy private SSH key to new machine
$ scp <id_newmachine> <user@newmachine>:~/.ssh/id_rsa
Copy GPG key pair to new machine
$ scp \<<johndoe@example.com>\>.gpg-* <user@newmachine>:~/
SSH into new machine
$ ssh <user@newmachine>
Import GPG keys
$ gpg --import \<<johndoe@example.com>\>.gpg-public
$ gpg --allow-secret-key-import \<<johndoe@example.com>\>.gpg-secret
Use Git to clone password store from Raspberry Pi to our machine
$ git clone ssh://pi@raspberry.local:~/password-store
You should now be able to use pass in the same way as you do on your other machine.
Software used
Conclusion
You can only push and pull passwords when on the same local network as the Raspberry Pi.
You must pull your passwords when on your local network. You are able to use them while disconnected. If you add new passwords while disconnected you must join your local network to be able to push them to the Raspberry Pi.
Here’s the reason I chose not to expose my password store to the Internet: There could be undiscovered security bugs in the software used. If it is exposed to the the Internet and a bug is discovered, in the time between realising the issue and updating the software the passwords may be comprimised
If you would like access to you password store over the internet you will need to forward ports on your router to allow access to your Raspberry Pi.
In the next post we will look at how to use your password store on other operating system (Android & Windows).